Data Storage
This system provides a secure, reliable, and Amazon S3-compatible storage service. You can pre-upload your programs or data to a bucket, and then mount the bucket when using other services in this system to quickly access the data stored in it. The same bucket can be mounted to multiple services simultaneously, allowing you to easily share data between services or collaborate with other project members. You can also enable permission settings for the bucket to share data with specific project members.
Bucket management
Create a bucket
-
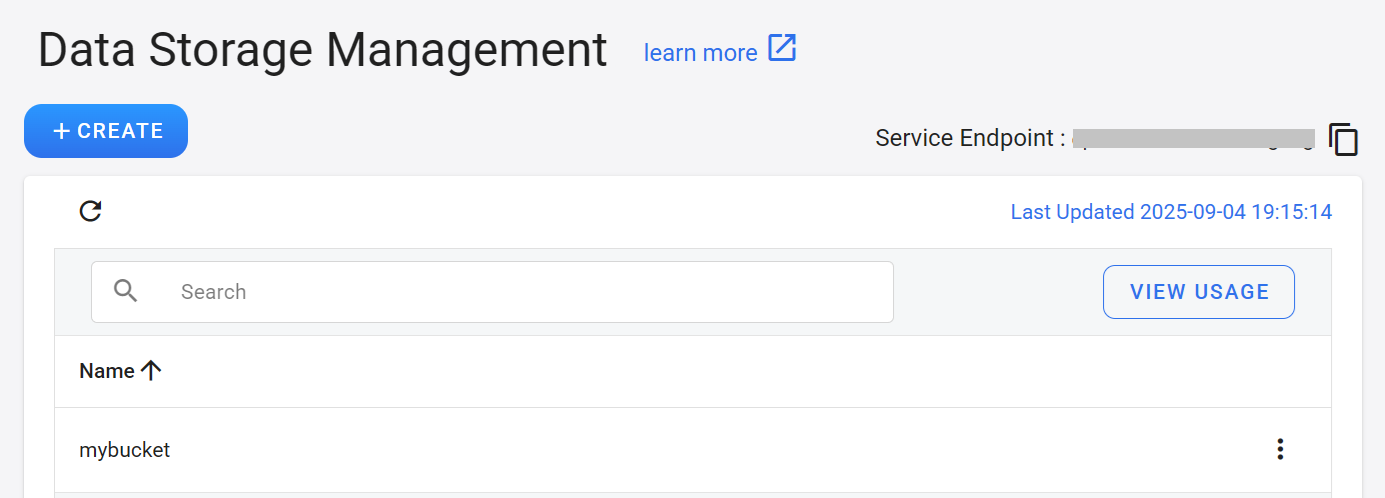
Select Data Storage from the Services list to enter the Data Storage Management page, then click +CREATE.
-
Enter the name of the bucket and press OK.
-
Once the bucket is created, it will appear on the list of the Data Storage Management page. Click the bucket you want to use in the bucket list to enter the bucket's content page to start using it.
Delete a bucket
-
Click the more options icon to the right of the bucket list then click Delete.
-
Confirm the name of the bucket to be deleted and click OK.
Once the bucket is deleted, all the data in the bucket will be deleted and cannot be recovered. Please be aware that the bucket in the project is shared by all members, any modification or deletion may affect the users in the group.
View usage
- Click on VIEW USAGE at the top right of the Data Storage Management page allows you to view the storage usage information for the project.
Manage folders/files
Create a folder
- In the bucket content list, click the Create Folder icon in the command bar above.

- Enter the folder name and click OK.
Upload files
- Go to the bucket's content page and click the Upload icon in the command bar above.

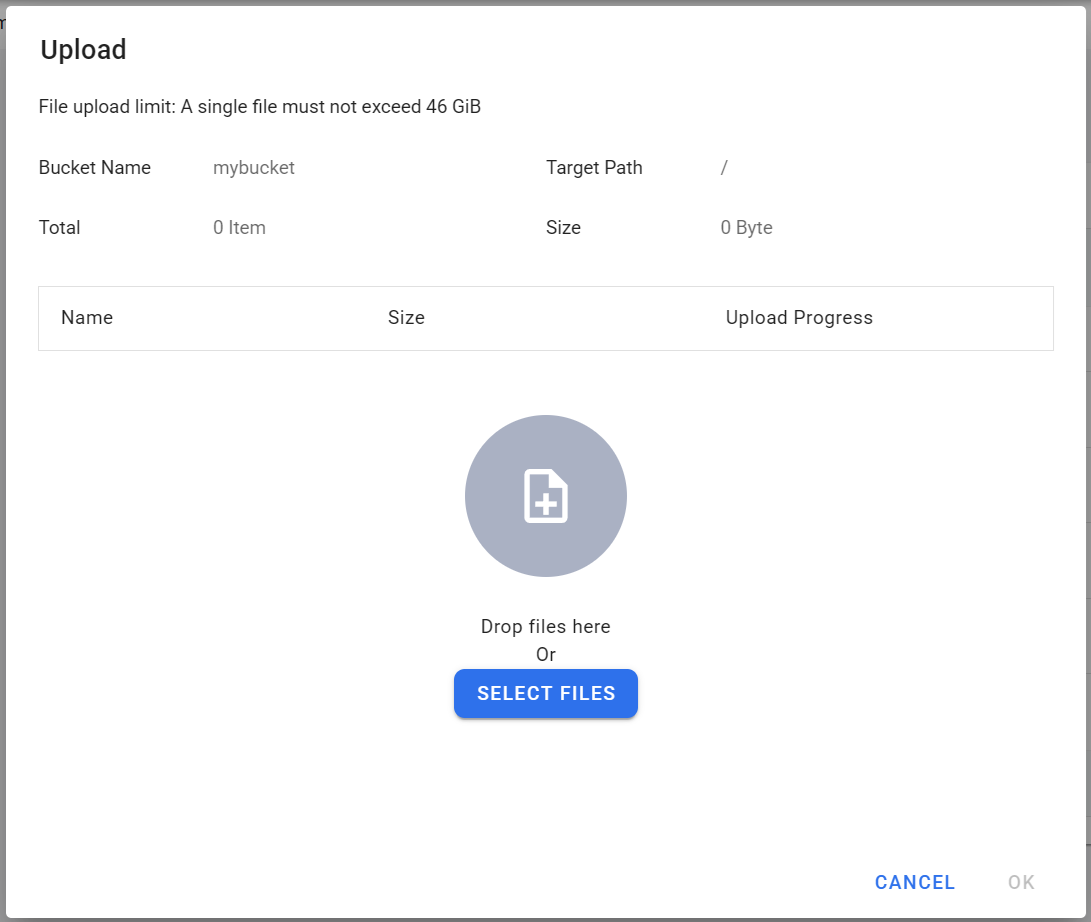
- Within the Upload window, you can directly drag file(s) or folder(s) to the window or click SELECT FILES to select the file(s) or folder(s) you want to upload, and then click OK after selection.
File Upload Limits
- The maximum single file size is 46 GiB for the cloud platform.
- To upload large or large files, we recommend using third-party software compatible with the Amazon S3 interface (e.g., S3 Browser or Cyberduck).
- The maximum upload size for a single image file is based on the 1.5 TB capacity currently supported by the cloud platform.
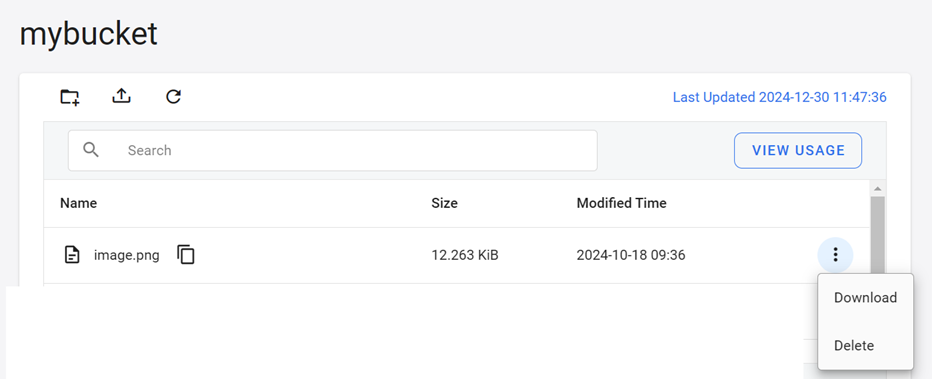
- After the upload is successful, return to the content list page and information such as file name, size, update date, etc. will be displayed.
Download a file
- Click the more options icon to the right of the list then click Download.
Delete a file
- Click the more options icon to the right of the list then click Delete.
Copy file/folder name
- Click the copy icon to the right of the file or folder name to copy the file/folder name.
Search files
- Enter the keywords you want to query in the search box to filter out matching items.
Other access methods
Use Amazon S3 compatible third-party software
The Data Storage service provides an Amazon S3-compatible protocol. In addition to accessing storage files through the user interface, other third-party software can also be used to transfer large and large files. The following explains how to obtain the required information for using third-party software.
1. Download and install Amazon S3 compatible third-party software
- Windows: Use S3 Browser
- MacOS: Use Cyberduck
- Linux (command line mode): use Rclone
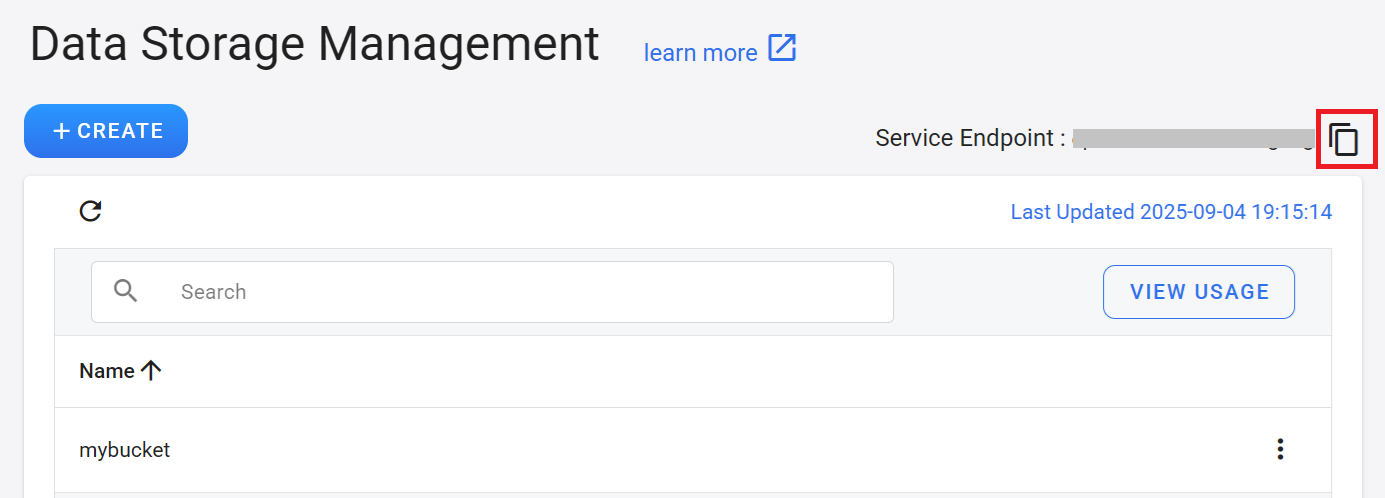
2. Obtain the connected service endpoint
- Copy the Service Endpoint in the upper right corner of the management page.
3. Access Key and Secret Key for S3 connection
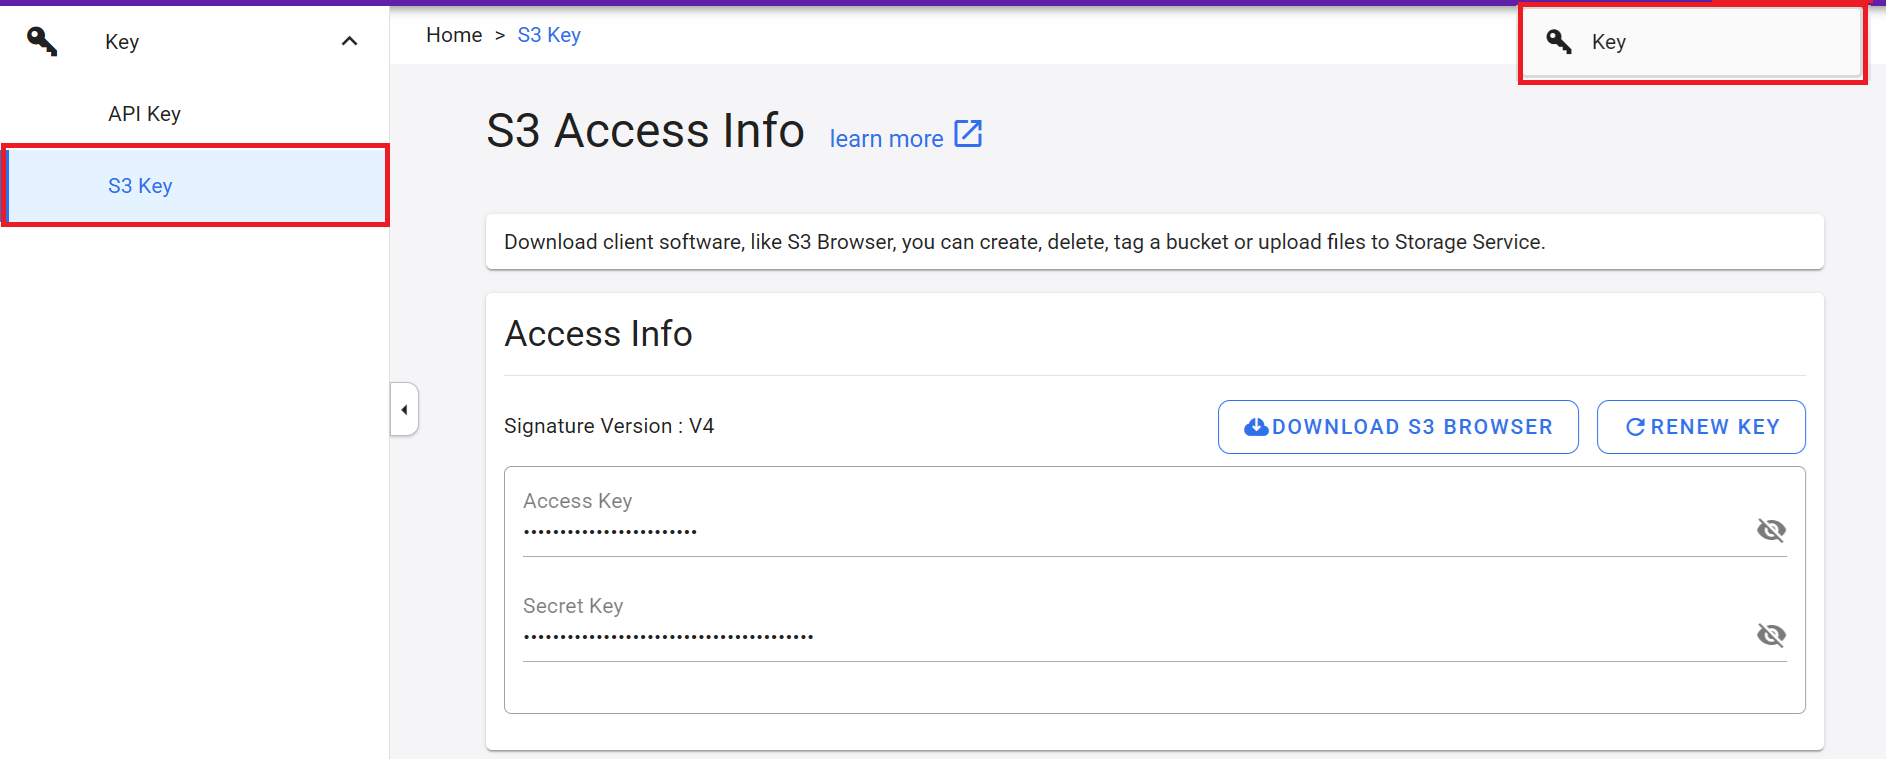
- Click the username in the top right corner, and then click Key.
- Then click S3 Key on the left menu to enter the S3 Access Info page.
- The S3 Access Info page provides information such as Access Key and Secret Key.
- Click RENEW KEY on the top right to update your key.
Tips for using the key
- There is no preset expiration date for this S3 key. Once it is set in the key settings of the third-party software, you can connect directly when you open the third-party software next time.
- Please keep your key safe, or update the key regularly to prevent key leakage. After the key is updated, please remember to update the key settings in the third-party software.
4. Connect to the file transfer node
- Use Amazon S3 compatible third-party software to connect to the file transfer node, e.g. S3 Browser. S3 Browser is a simple and easy-to-use Amazon S3 Windows client program that provides a simple web service interface for storing and retrieving data from anywhere on the web at any time. The free version of S3 Browser is for non-commercial use only, please refer to the official website of S3 Browser for details.
- If you have not installed S3 Browser before, please go to the official website of S3 Browser, and then click Download S3 Browser to download and install S3 Browser.
- After installation, open S3 Browser and set the access info as below:
- Account Type: S3 Compatible Storage
- REST Endpoint: The service endpoint in the upper right corner of the cloud service management page
- Access Key ID: Access Key provided on the S3 Connection Information page
- Secret Access Key: The Secret Key provided on the S3 Connection Information page
- Use secure transfer (SSL/TLS): Please check this option
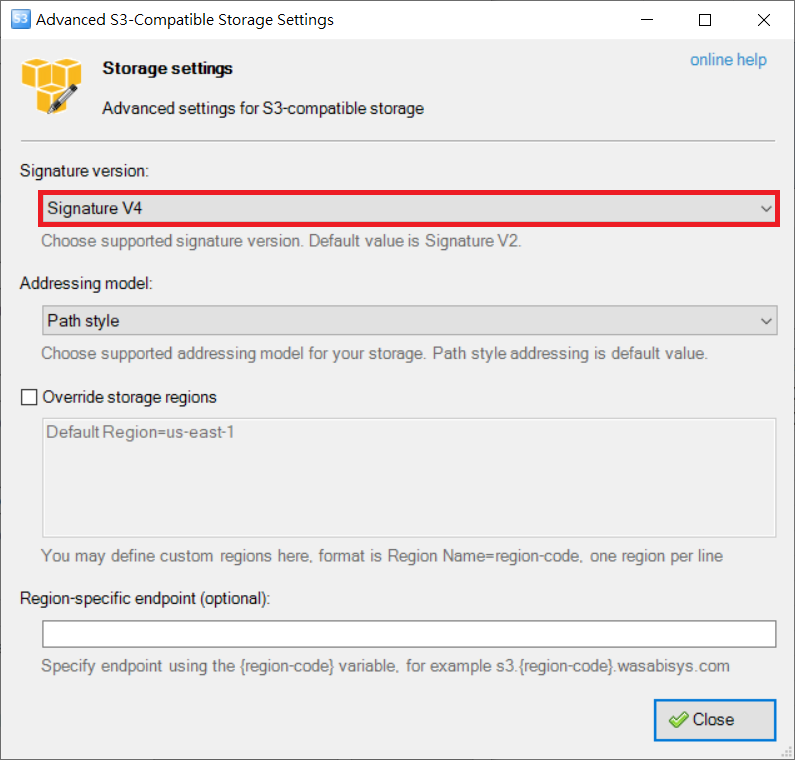
- Signature Version (Advanced S3-compatible storage settings): Signature V4
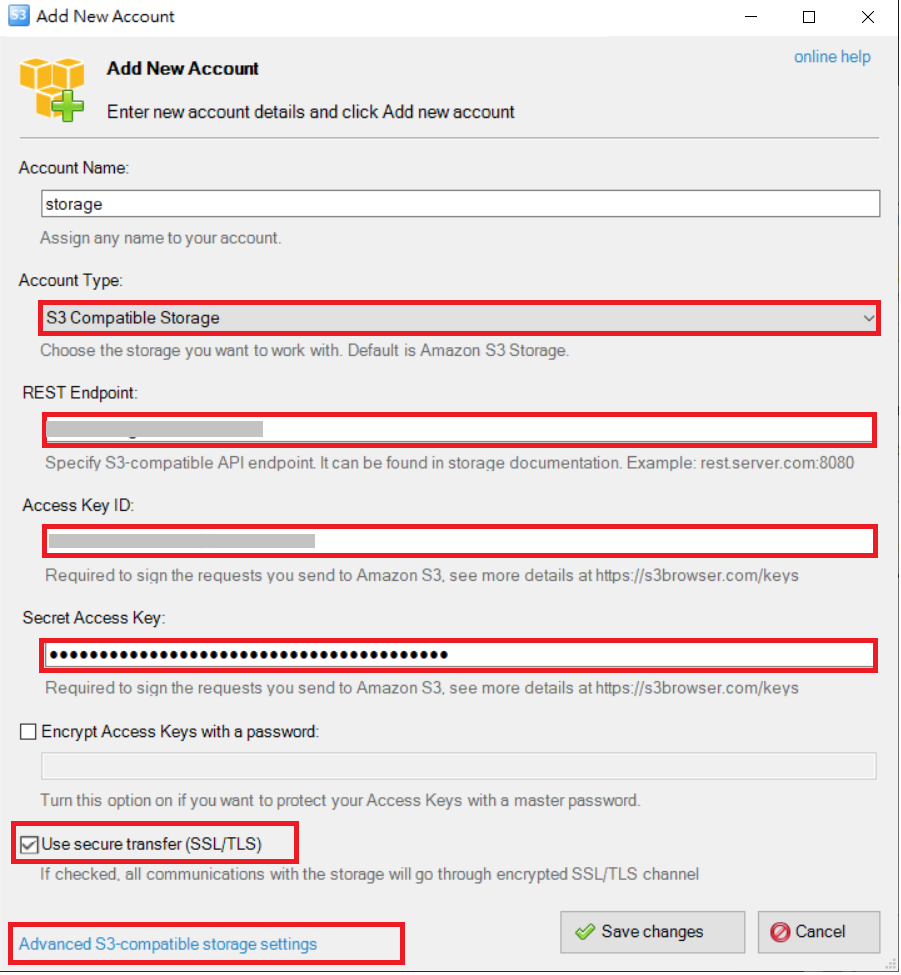
- Click Advanced S3-compatible storage settings, and then select Signature version: Signature V4.