Virtual Machine
The Virtual Machine service provides general virtual machine solutions, allowing you to easily deploy and manage virtual machines, flexibly allocate storage space and computing resources for virtual machines, and has mechanisms such as elastic IP, load balancing and backup, which are both intelligent and cost-saving. The best choice.
Create a virtual machine
- Select Virtual Machine from the Services list to enter the Virtual Machine Management page, then click + CREATE.
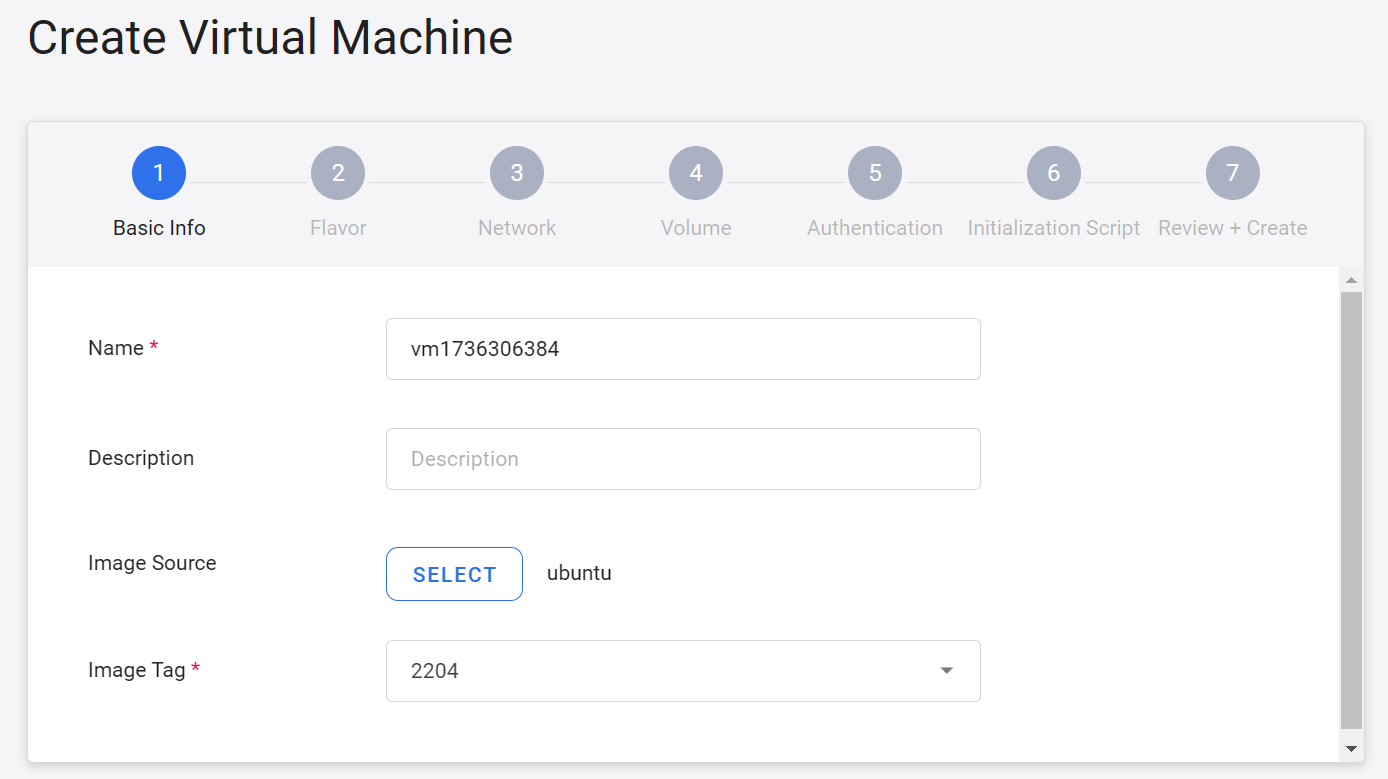
1. Basic info
- Fill in the name, description and select the image source and image tag.
- Then click NEXT: FLAVOR>.
2. Flavor
- Select the hardware specifications. The hardware options provided here will vary depending on the server's hardware configuration. System administrators can also set them according to project requirements.
- Click View Resource Usage/Quota in the upper right corner to view the current resource quota and used amount. If the available resource quota has reached the upper limit and some models cannot be selected, you can contact your system administrator to increase the project resource quota.
- Then click NEXT: NETWORK>.
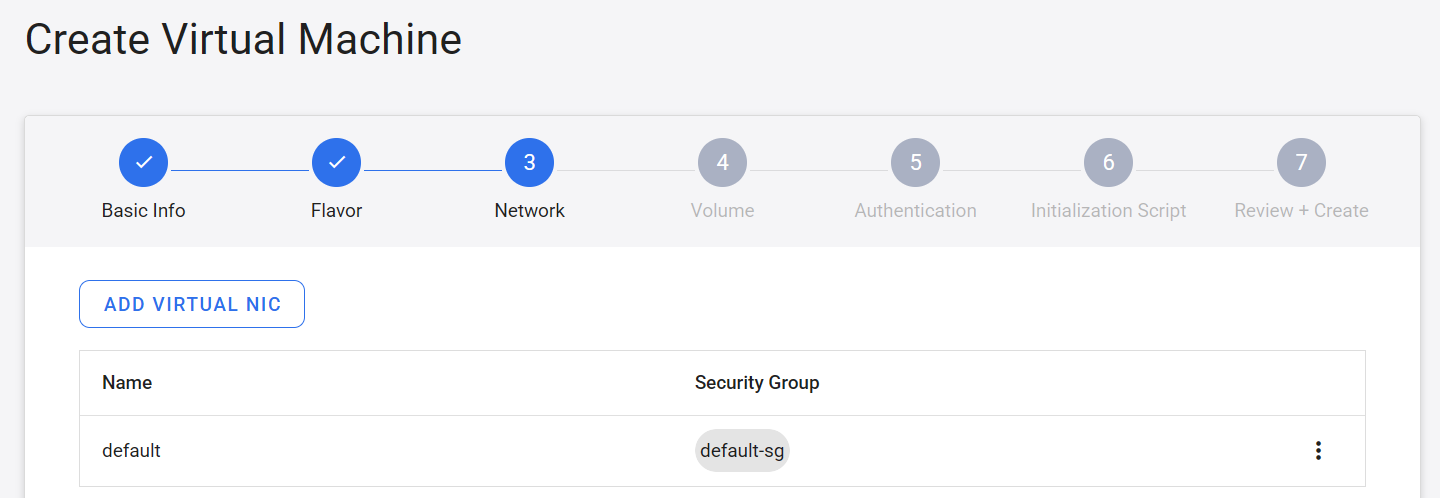
3. Network
- For first-time use, please create a virtual network first. Refer to Create Virtual Network for the steps.
- Virtual networks can only be created by a Project Admin. If you are a Project User, please contact the Project Admin of your project for assistance.
- Network:Click ADD VIRTUAL NIC and select at least one virtual NIC, security group, and Add Floating IP options.
- Then click NEXT: VOLUME>.
When creating a virtual machine, it is recommended to set up at least one set of security group rules before logging in through the Console.

4. Volume (Optional)
- Click CREATE NEW VIRTUAL VOLUME to create a virtual disk and then mount it.
- Click ATTACH VIRTUAL VOLUME to mount a virtual volume. The maximum number of disks that can be mounted is five.
- Then click NEXT: AUTHENTICATION>.
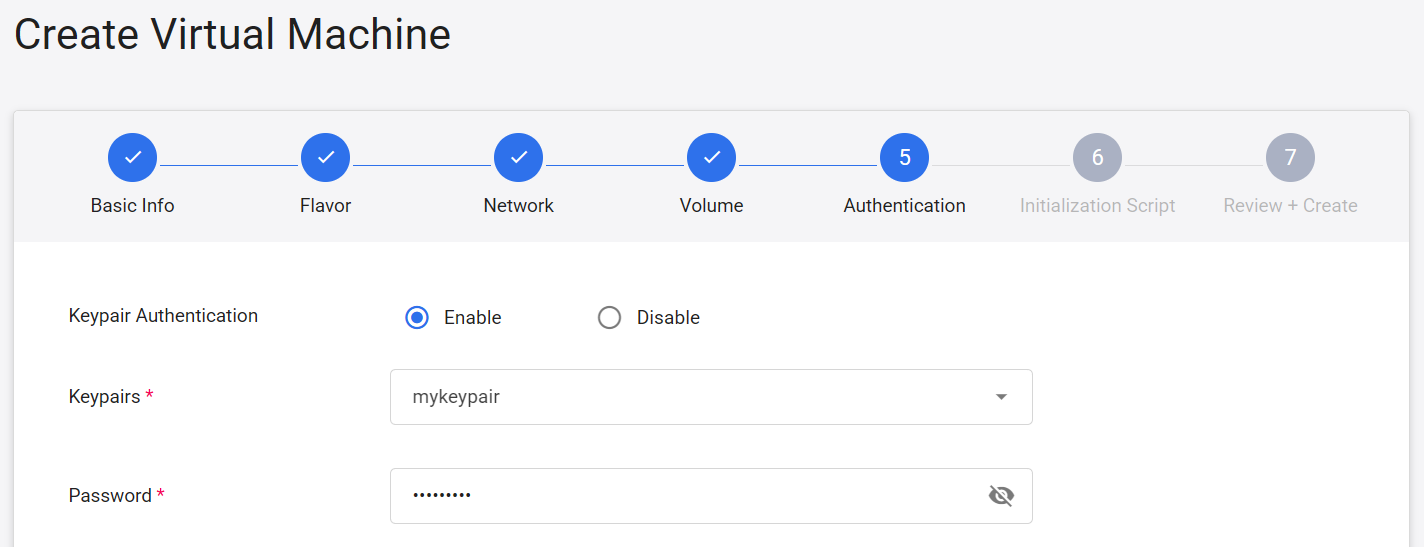
5. Authentication
- Set the Keypair or Password required for login.
- Keypair Authentication: (Optional) Select Enable or Disable keypair Authentication.
- Keypair: Select a keypair. If you have not created a keypair yet, please Create a keypair first.
- Password: Set the password for logging into the virtual machine.
- Click NEXT: INITIALIZATION SCRIPT> when finished.
6. Initialization script (Optional)
- Enter the initialization command, or import an existing file, then click NEXT: REVIEW + CREATE >.
7. Review + Create
- Check the creation settings and click CREATE after confirming.
Manage virtual machines
- Once the virtual machine is created, it will appear in the list. Click the list to view the detailed information of the service. When the state is displayed as
active, you can start using it.
When the state is displayed as under review, it means that this resource needs to be approved by the project admin before it can be created. The project admin can approve or reject the creation of the resource through the following two operations.
- On the management page, click the more options icon, then click Review.
- Click the
 Review icon in the upper command bar.
Stop/Start
- Click the Stop icon in the upper command bar to shut down the virtual machine and release related resources.
- The stats of a stopped virtual machine is displayed as
shutoff, and the Stop icon in the upper command bar will change to Start. Click the icon to start the virtual machine.
Suspend/Resume
-
Click the Suspend icon in the command bar above to pause the virtual machine while retaining its resources.
-
The state of a suspended virtual machine will be displayed as suspended, and the Resume icon in the command bar above will change to Resume. Clicking this icon will resume the virtual machine.
Reboot
- When the virtual machine's state is
active, click the Reboot icon in the upper command bar to reboot the virtual machine.
Create an image
- Click the Create Image icon on the top command bar.
- Select or enter the name, description, OS and version, and click OK when completed.
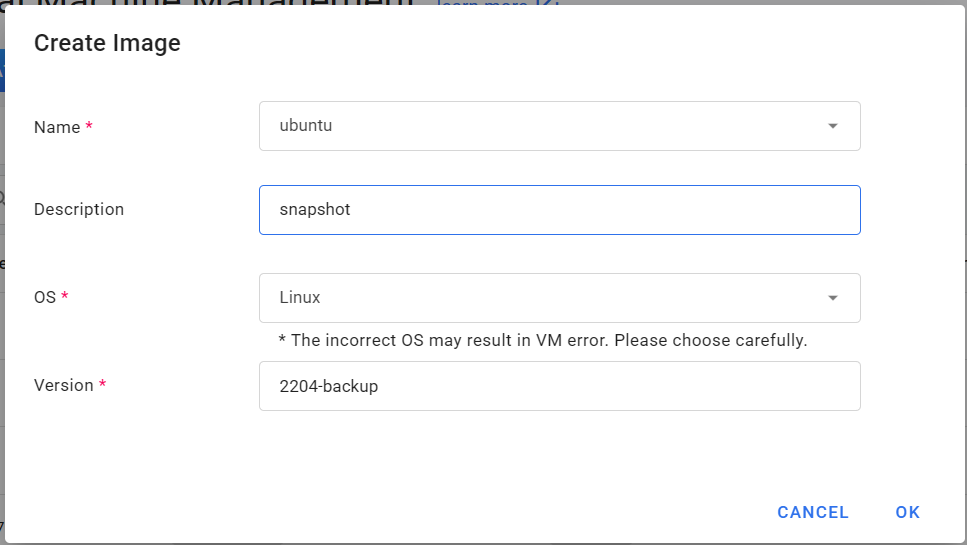
- After creation, this virtual machine will be created as an incremental image, which can be viewed at Image Management > VM Image.
Delete
- If the virtual machine is no longer in use, click the Delete icon in the upper command bar to permanently delete the virtual machine.
Notes on deleting virtual machines
- The data in the operating system (boot) disk will also be permanently deleted. If you need to keep it, you can Create an image first.
- The data disk will be automatically separated and the data in the disk will not disappear.
Edit description
- Go to the virtual machine details page, click EDIT to the right of the description, and click OK when completed.
Change flavor
- Please stop the virtual machine before changing the flavor settings.
- Enter the virtual machine details page, click CHANGE on the right side of the hardware settings, click the hardware specifications you want to use, and click OK when completed.
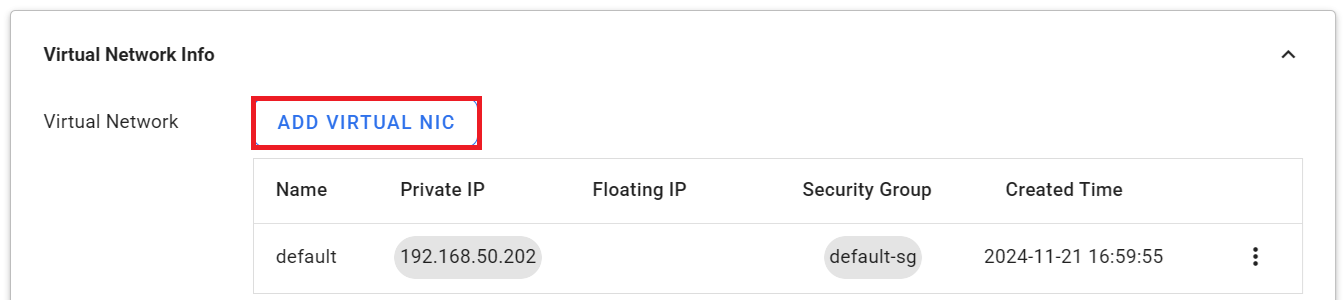
Add a virtual NIC
- In the Virtual Network Information area, click ADD VIRTUAL NIC and select a virtual network and security group.
Attach a floating IP
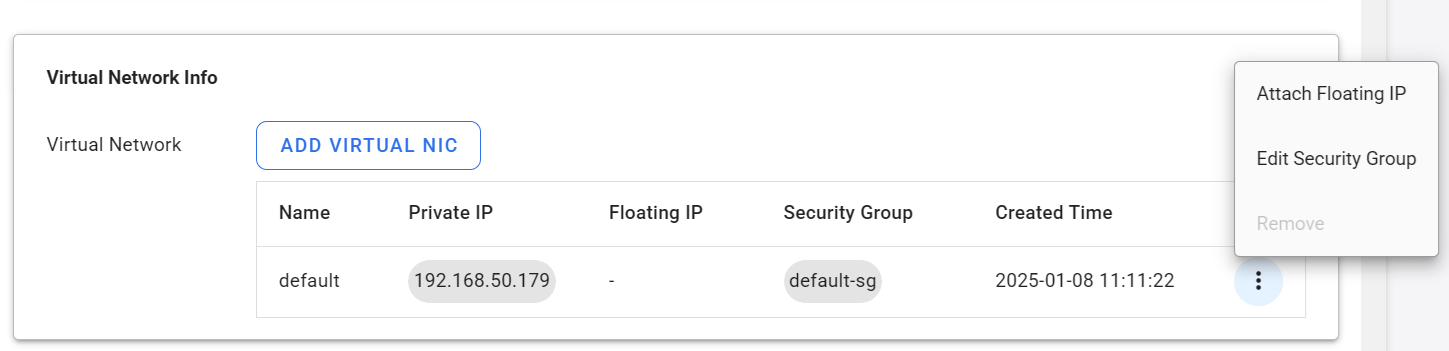
- Click the more options icon to the right of the Virtual Network list, then click Attach Floating IP.
-
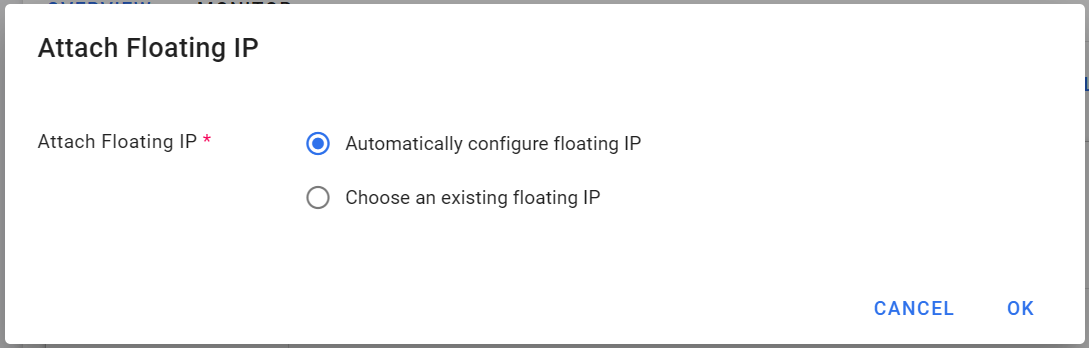
Click Automatically configure floating IP or Choose an existing floating IP.
-
After the configuration is complete, the associated floating IP will be displayed in the list.
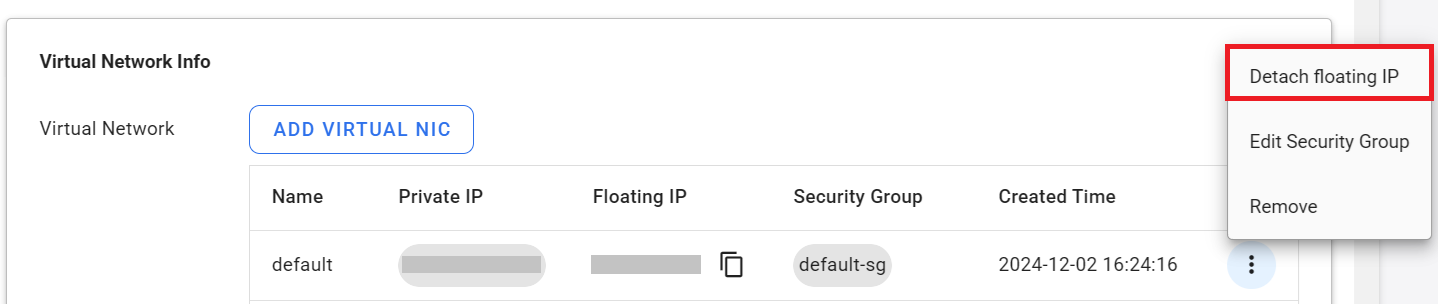
Detach a floating IP
- Click the more options icon on the right side of the virtual network list, then click Detach Floating IP, and then click OK.
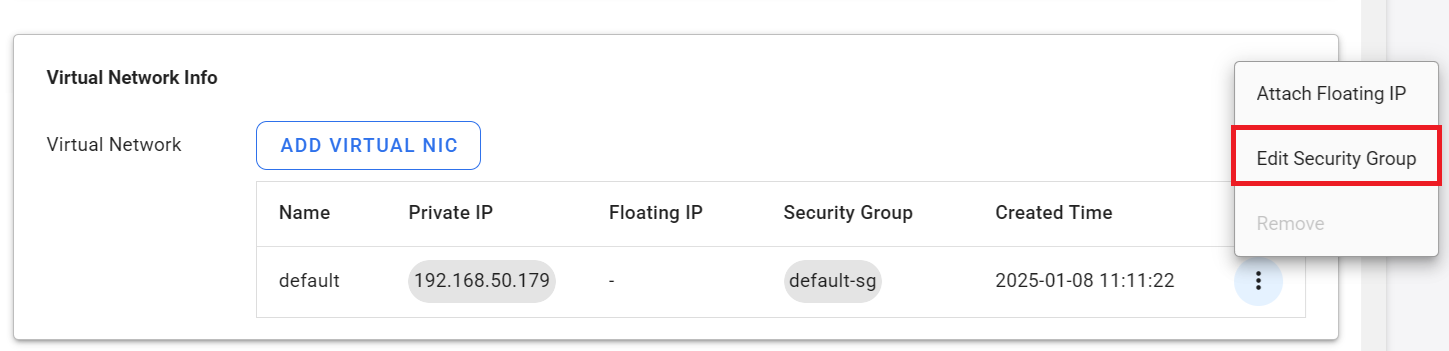
Editing a security group
- Click the more options icon on the right side of the Virtual Network list, then click Edit Security Group, and then click OK when completed.
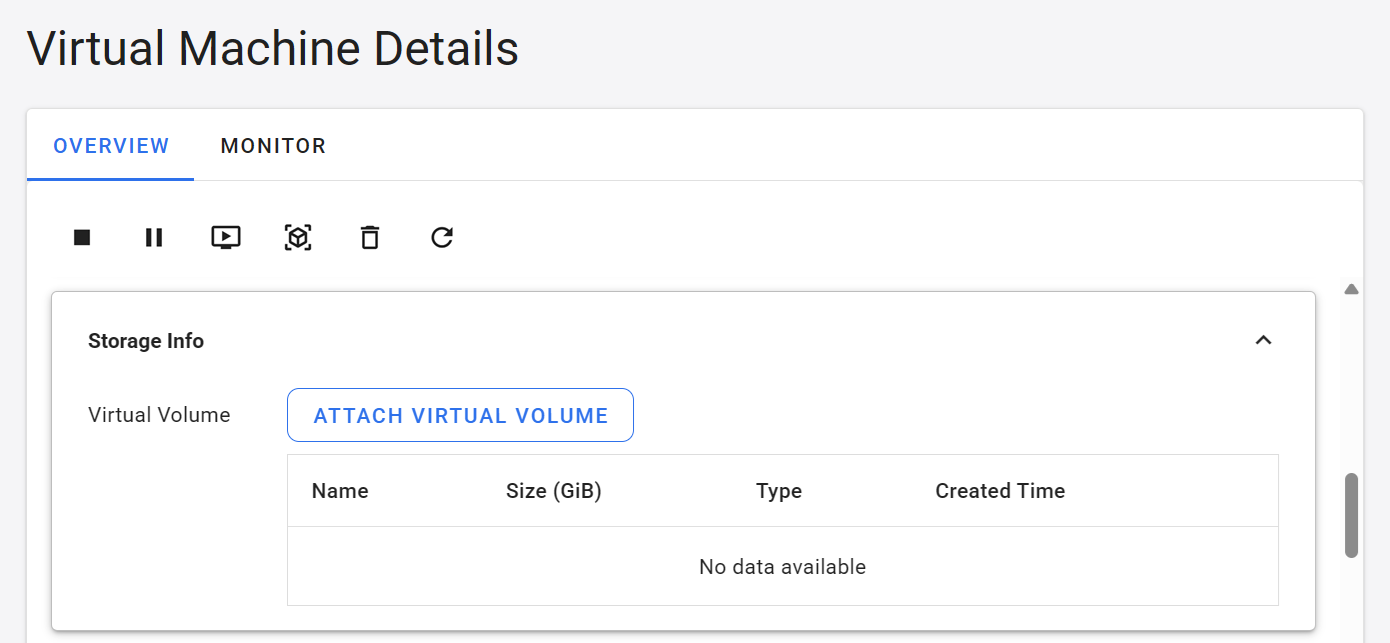
Attach a virtual volume
- On the virtual machine details page, in the Storage Info section at the bottom, click ATTACH VIRTUAL VOLUME, then select the virtual volume you want to attach and click OK.
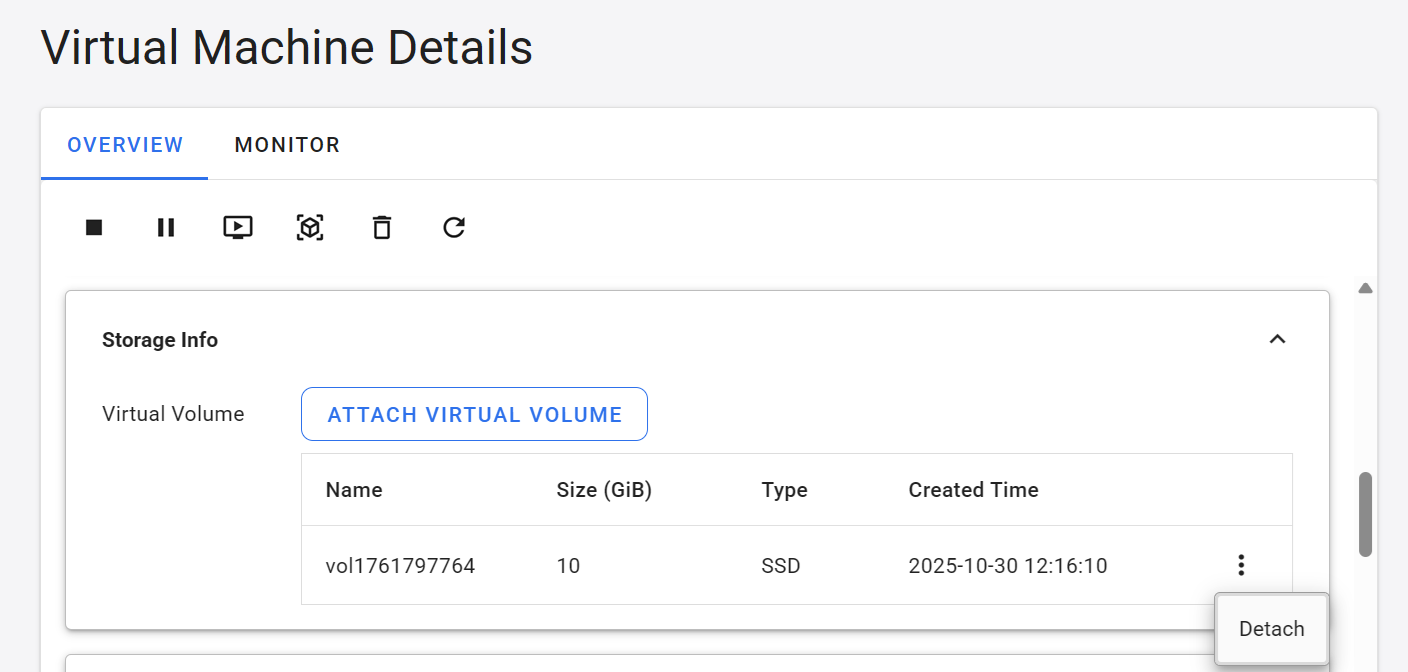
Detach a virtual volume
- On the virtual machine details page, in the Storage Info section at the bottom, move your mouse to the more options icon to the right of the mounted virtual disk, then click Detach.
Monitoring
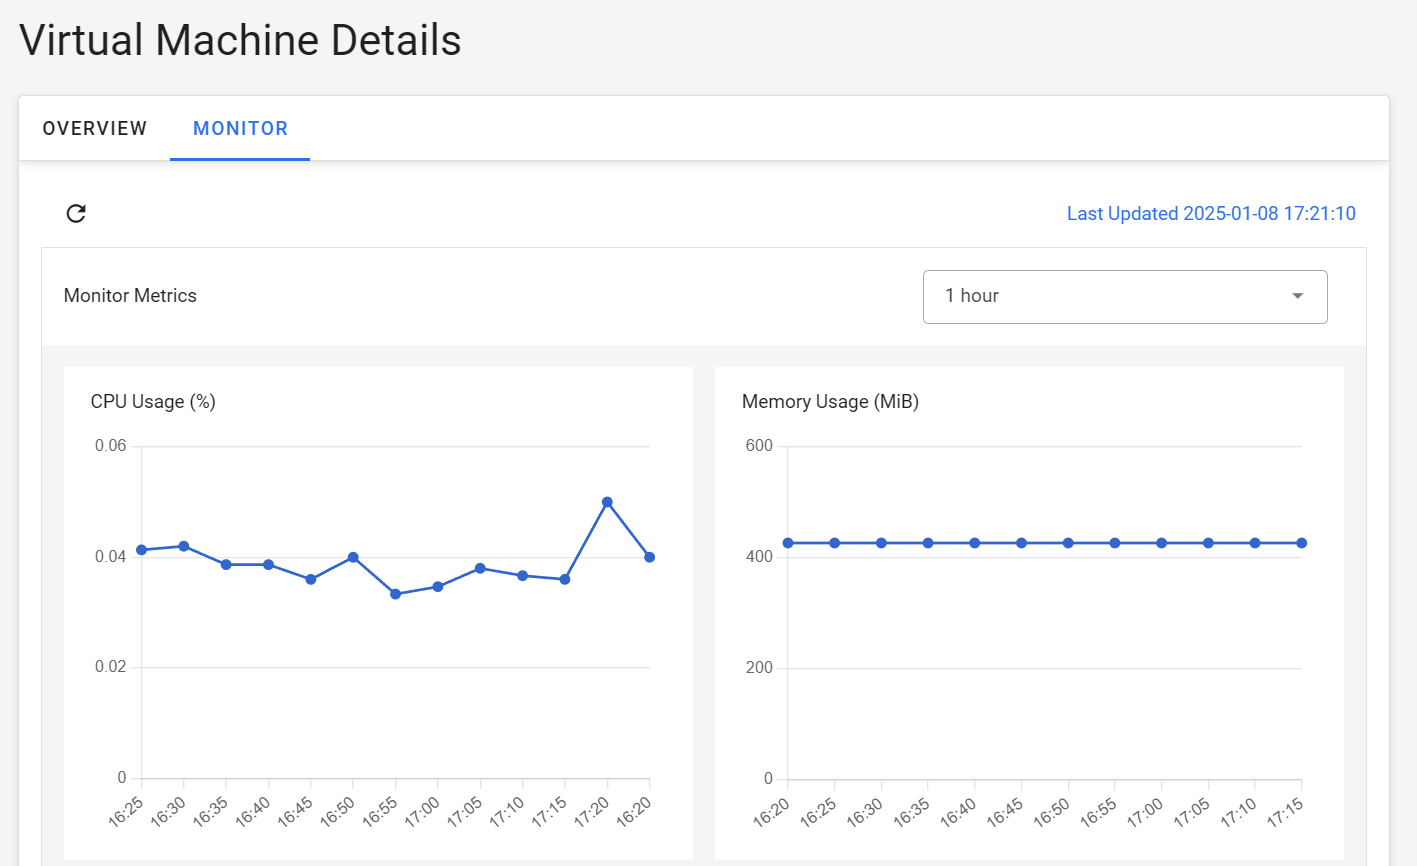
- Enter the virtual machine details page, then click the MONITOR tab at the top to view monitoring indicators.
- CPU usage (%): CPU usage. If 2 (200%) is displayed, it means that 2 CPU resources are fully utilized.
- Memory Usage (MiB): Memory usage.
- Disk usage (byte/s): You can view the read/write speed of each disk.
- Network Usage (byte/s): The network traffic output by the virtual machine, which combines east-west traffic (horizontal transmission between virtual machines) and north-south traffic (traffic between the client and the virtual machine).
Advanced Operations
- Use the upper right menu to switch the time you want to observe (1 hour, 3 hours, 8 hours, 24 hours).
- Move the cursor to the blue dot to display the usage value.
Connect to the virtual machine
- Click Open on the right side of Console to quickly connect to the virtual machine in your browser.
- Login account: If you use the default VM image provided by the system, the default account is as follows:
| VM Image | Default Login Account |
|---|---|
| ubuntu | ubuntu |
| rocky | cloud-user |
| windows | administrator |
- Login Password: Please use the password you set when creating the virtual machine.

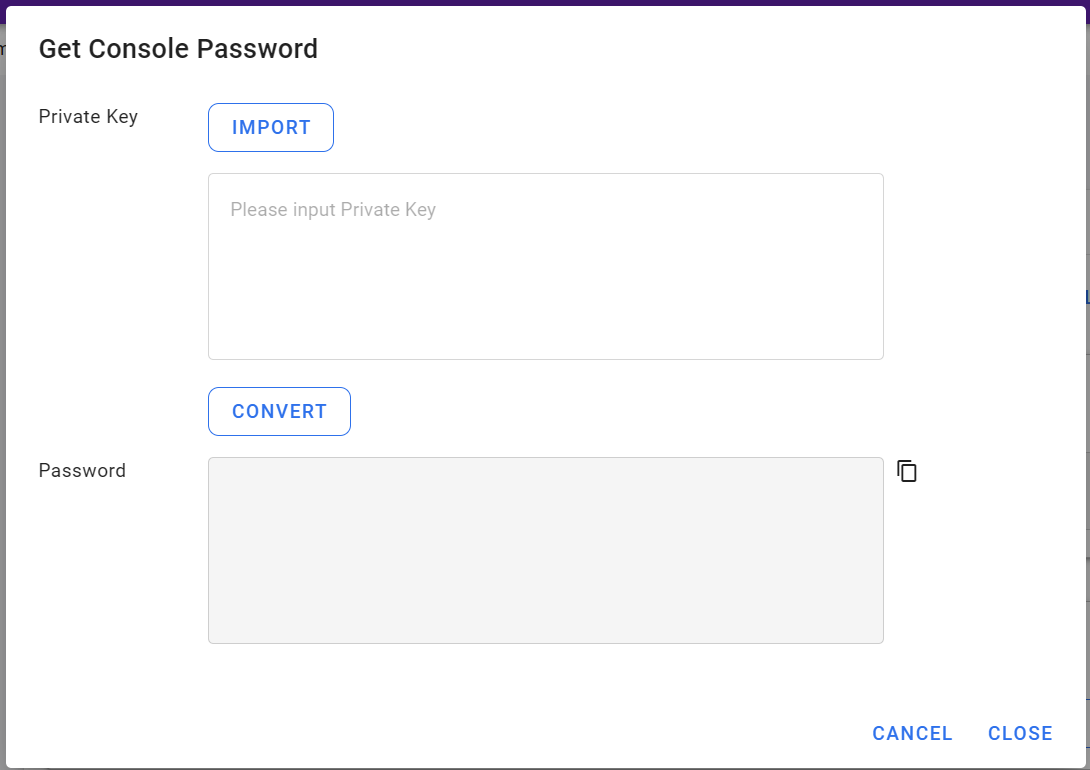
- If key authentication is enabled when creating a virtual machine, the private key can be converted into a password through GET CONSOLE PASSWORD.
- Click GET CONSOLE PASSWORD to open the Get Console Password window, then click IMPORT and select the key file, or paste the private key directly, then click CONVERT to get the password.